In a previous post introducing BDD I outlined a simple bus ticket application. Since then I've been looking at JBehave, and thought I'd try building a simple version of the bus tickets application, using JBehave to support behavior-driven development of the application.
About JBehave
JBehave is a testing framework that takes the BDD concepts and applies it to JUnit tests, so you can effectively test your acceptance criteria directly using automated unit tests. It uses BDD acceptance criteria as steps in a test case, and each Given/When/Then statement is interpreted and executed as a method. The acceptance criteria is simply stored in a text file which is read by JBehave to guide the steps taken when the test case is run.
Setting up JBehave
Download the distribution jars from http://jbehave.org (at the time of writing, version 2.3.2 is the latest).
Or for maven:
<dependency>
    <groupId>org.jbehave</groupId>
    <artifactId>jbehave-core</artifactId>
    <version>2.3.2</version>
    <scope>test</scope>
</dependency>
The scenarios
Lets take one of the scenarios from my previous post (slightly modified):
Scenario: Inserting initial coins

Given that the application is initialised
When a coin is inserted
Then ensure the time indicator displays the purchased time
I will use this as the behavioural spec for the initial work on the application. From the description of the scenario, we can instantly tell that we're going to need a coin handler and time indicator as part of the application.
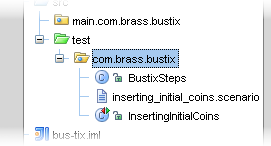
Note: Before I put this into a text file, I should point out that the
default configuration of JBehave requires that the text files are named to
match the class names of the test case – so if we had the test case
InsertingInitialCoins, then the text file containing the scenario must be
named inserting_initial_coins (with no extension). I don't particularly like
this, so as you'll see I modify the constructor so that I can call my scenario
'inserting_initial_coins.story', to make it clear the purpose of the file.
We'll need to create a test case, which extends
org.jbehave.scenario.Scenario, and a 'step' class which extends
org.jbehave.scenario.steps.Steps. The step class will contain all the
corresponding steps for the story file(s).
Create the test case class InsertingInitialCoins
package com.brass.bustix;

import org.jbehave.scenario.PropertyBasedConfiguration;
import org.jbehave.scenario.Scenario;
import org.jbehave.scenario.parser.ClasspathScenarioDefiner;
import org.jbehave.scenario.parser.PatternScenarioParser;
import org.jbehave.scenario.parser.ScenarioDefiner;
import org.jbehave.scenario.parser.UnderscoredCamelCaseResolver;

public class InsertingInitialCoins extends Scenario {
    public InsertingInitialCoins() {
        this(Thread.currentThread().getContextClassLoader());
    }

    public InsertingInitialCoins(final ClassLoader classLoader) {
        super(new PropertyBasedConfiguration() {
            public ScenarioDefiner forDefiningScenarios() {
                return new ClasspathScenarioDefiner(
                    new UnderscoredCamelCaseResolver(".story"),
                    new PatternScenarioParser(this), classLoader);
                }
            }, new BustixSteps());
        }
    }
The default constructor calls the custom scenario file loader, so that we can append '.story' to the story files. Steps class (empty for now):
package com.brass.bustix;

import static org.jbehave.Ensure.ensureThat;
import org.jbehave.scenario.annotations.Given;
import org.jbehave.scenario.annotations.Then;
import org.jbehave.scenario.annotations.When;
import org.jbehave.scenario.steps.Steps;

public class BustixSteps extends Steps {
    // TODO – fill in steps
}
Make sure that the .story file is copied to your compile directory! Otherwise you will get the error like:
org.jbehave.scenario.errors.ScenarioNotFoundException: Scenario
com/brass/bustix/inserting_initial_coins.scenario could not be found by
classloader sun.misc.Launcher$AppClassLoader@133056f
When you run the test for the first time, you will see this output:
Scenario: Inserting initial coins
Given that the application is operating (PENDING)
When a coin is inserted (PENDING)
Then ensure the time indicator displays the purchased time (PENDING)
Perhaps confusingly, the test has passed despite the steps not being
executed – PENDING means that the step hasn't been executed because no
corresponding method has been found.
Defining Steps
JBehave uses annotations to mark a method as a step type.
The annotation is the first word of the step we're using, with the rest of the
text as a parameter to that annotation. So for our first step 'Given that the
application is operating' we write it as an @Given annotation:
@Given("that the application is operating")
And then JBehave knows that the function following that annotation is what
needs to be executed for that step.
So now in BustixSteps we add:
@Given(“that the application is initialised”)
public void initialise() {
    ensureThat(false);
}
The assertion statement obviously ensures that the test will fail – an empty
test will pass without error (as it usually does with JUnit). The ensureThat
function comes from JBehave's wrapping of
hamcrest matchers – an interesting
alternative to Junit's assert statements.
Rerunning the test, we now get the failure we want!
Scenario: Inserting initial coins
Given that the application is operating (FAILED)
 When a coin is inserted (PENDING)
 Then ensure the time indicator displays the purchased time (PENDING)

java.lang.AssertionError:
Expected: is <true>
got: <false>
...
Lets do the same for the rest of the steps in this scenario while we're here:
package com.brass.bustix;

import static org.jbehave.Ensure.ensureThat;
import org.jbehave.scenario.annotations.Given;
import org.jbehave.scenario.annotations.Then;
import org.jbehave.scenario.annotations.When;
import org.jbehave.scenario.steps.Steps;

public class BustixSteps extends Steps {

    @Given("that the application is operating")
        public void startApplication() {
        ensureThat(false);
    }

    @When("a coin is inserted")
    public void insertCoin() {
        ensureThat(false);
    }

    @Then("ensure the time indicator displays the purchased time")
    public void testThatTimeIsDisplayed() {
        ensureThat(false);
    }
}
At this stage, we've got our steps outlined for our basic scenario, and we can begin the test-driven development of the application! Note: when you have a scenario step that begins with an 'And', it is evaluated as being of the same step type as the previous step, e.g.:
Given that the application is initialised
And the time indicator displays nothing
..are both evaluated by @Given annotations.
Next: check out the hamcrest matchers to make sure you're getting the full potential from your asserts!